Shadowsocks 2022 using Xray
September 16, 2023
Shadowsocks 2022 improves performance and includes full replay protection, addressing security issues present in the old protocol.
Server
You need a virtual private server or VPS. Our example will use a 1 GB Ubuntu 22.04 server, where we are logged in as the root user.
1. Install Xray-core on your server using the latest version, and configure it to run as root:
bash -c "$(curl -L https://github.com/XTLS/Xray-install/raw/main/install-release.sh)" @ install --beta -u root2. Generate a random port number:
echo $(($RANDOM + 10000))Our example will be 40687.
3. Since Shadowsocks defaults to transmitting TCP as TCP and UDP as UDP, open ports tcp/40687 and udp/40687 (using 40687 as our example) in your server's firewall.
4. Generate a preshared key. The length depends on the encryption method used:
| Encryption method | Key length (bytes) |
|---|---|
2022-blake3-aes-128-gcm |
16 |
2022-blake3-aes-256-gcm |
32 |
2022-blake3-chacha20-poly1305 |
32 |
This tutorial uses 2022-blake3-aes-128-gcm, so generate a 16-byte key like this:
openssl rand -base64 16Our example will be xYYav0349aK0t74yGYHtfw==.
5. Edit your server configuration file /usr/local/etc/xray/config.json based on this template:
{
   "inbounds": [
     {
       "port": 40687,
       "protocol": "shadowsocks",
       "settings": {
         "method": "2022-blake3-aes-128-gcm",
         "password": "xYYav0349aK0t74yGYHtfw==",
         "network": "tcp,udp"
       }
     }
   ],
    "outbounds": [
        {
            "protocol": "freedom",
            "tag": "direct"
        }
    ]
}
6. Restart xray systemd service with your final configuration file:
systemctl restart xraysystemctl status xrayClient
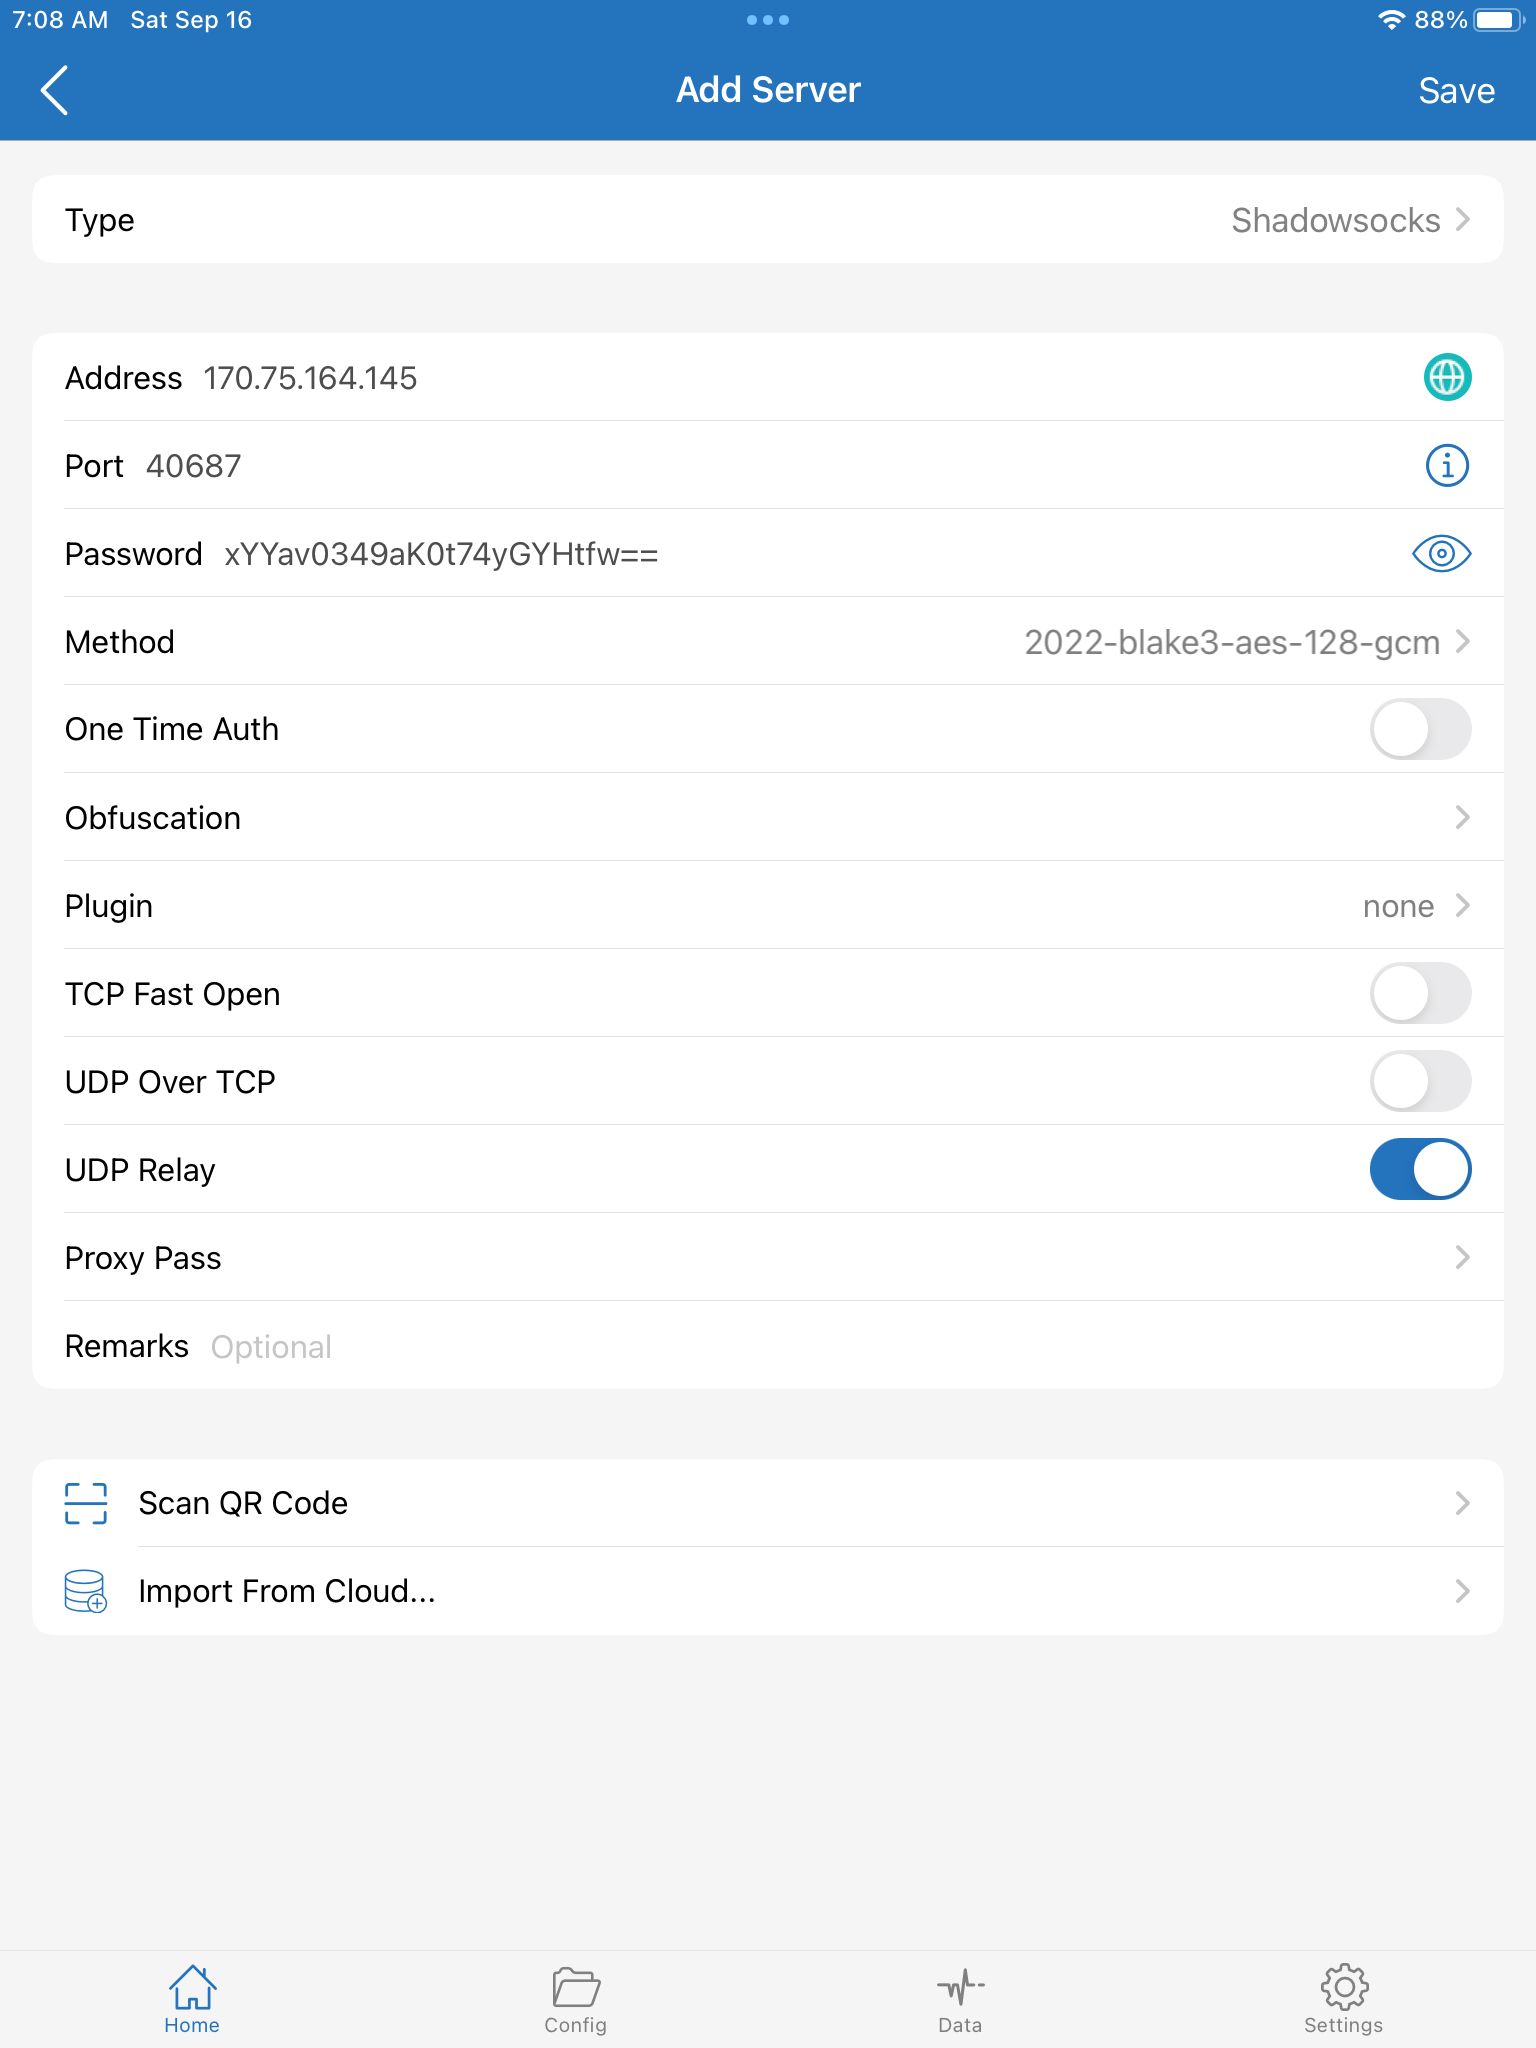
Configure your client to match the server's inbounds. For example:
