WireGuard over Xray
September 17, 2023
The scenario is that you want to connect to a WireGuard server at a remote location, but your WireGuard packets are being detected and blocked by a firewall. Therefore you decide to pass your WireGuard packets through an Xray tunnel. This is only possible on desktop platforms (Linux, macOS, or Windows), not on mobile devices.
The server IP address is given in the examples as:
YOUR.SERVER.IP.ADDRESSWireGuard server
Install and configure WireGuard on the server using https://github.com/angristan/wireguard-install.
curl -O https://raw.githubusercontent.com/angristan/wireguard-install/master/wireguard-install.shchmod +x wireguard-install.sh./wireguard-install.shWhen prompted by the script, choose a port number of 51820. Note that this port does not need to be open in your server firewall, as traffic will come through Xray before it gets to WireGuard.
Edit /etc/wireguard/wg0.conf, and reduce the [Interface] MTU to 1300:
MTU = 1300Restart WireGuard with your revised /etc/wireguard/wg0.conf:
systemctl restart wg-quick@wg0Securely download to the client the client configuration file that the script has generated. For example:
scp root@YOUR.SERVER.IP.ADDRESS:/root/wg0-client-windows.conf DownloadsXray server
Open port tcp/443 for input on the server.
Install Xray-core on your Xray server using the latest beta, and configure it to run as root:
bash -c "$(curl -L https://github.com/XTLS/Xray-install/raw/main/install-release.sh)" @ install --beta -u rootCreate your Xray configuration file. Here is an example of a completed server configuration file /usr/local/etc/xray/config.json:
{
    "log": {
        "loglevel": "warning"
    },
    "inbounds": [
        {
            "listen": "0.0.0.0",
            "port": 443,
            "protocol": "vless",
            "settings": {
                "clients": [
                    {
                        "id": "3b5390c5-52a2-472d-8dc2-103ef508be6c",
                        "flow": ""
                    }
                ],
                "decryption": "none"
            },
            "streamSettings": {
                "network": "h2",
                "security": "reality",
                "realitySettings": {
                    "show": false,
                    "dest": "www.lovelive-anime.jp:443",
                    "xver": 0,
                    "serverNames": [
                        "www.lovelive-anime.jp"
                    ],
                    "privateKey": "QNraK6EdxPNOzfbL2G1BTl_OeMSxm49H5vps2qzQ3E0",
                    "shortIds": [
                        "77c2358dc476ae9e"
                    ]
                }
            }
        }
    ],
    "outbounds": [
        {
            "protocol": "freedom",
            "tag": "direct"
        }
    ]
}
Restart xray systemd service with your final configuration file:
systemctl restart xraysystemctl status xrayXray client
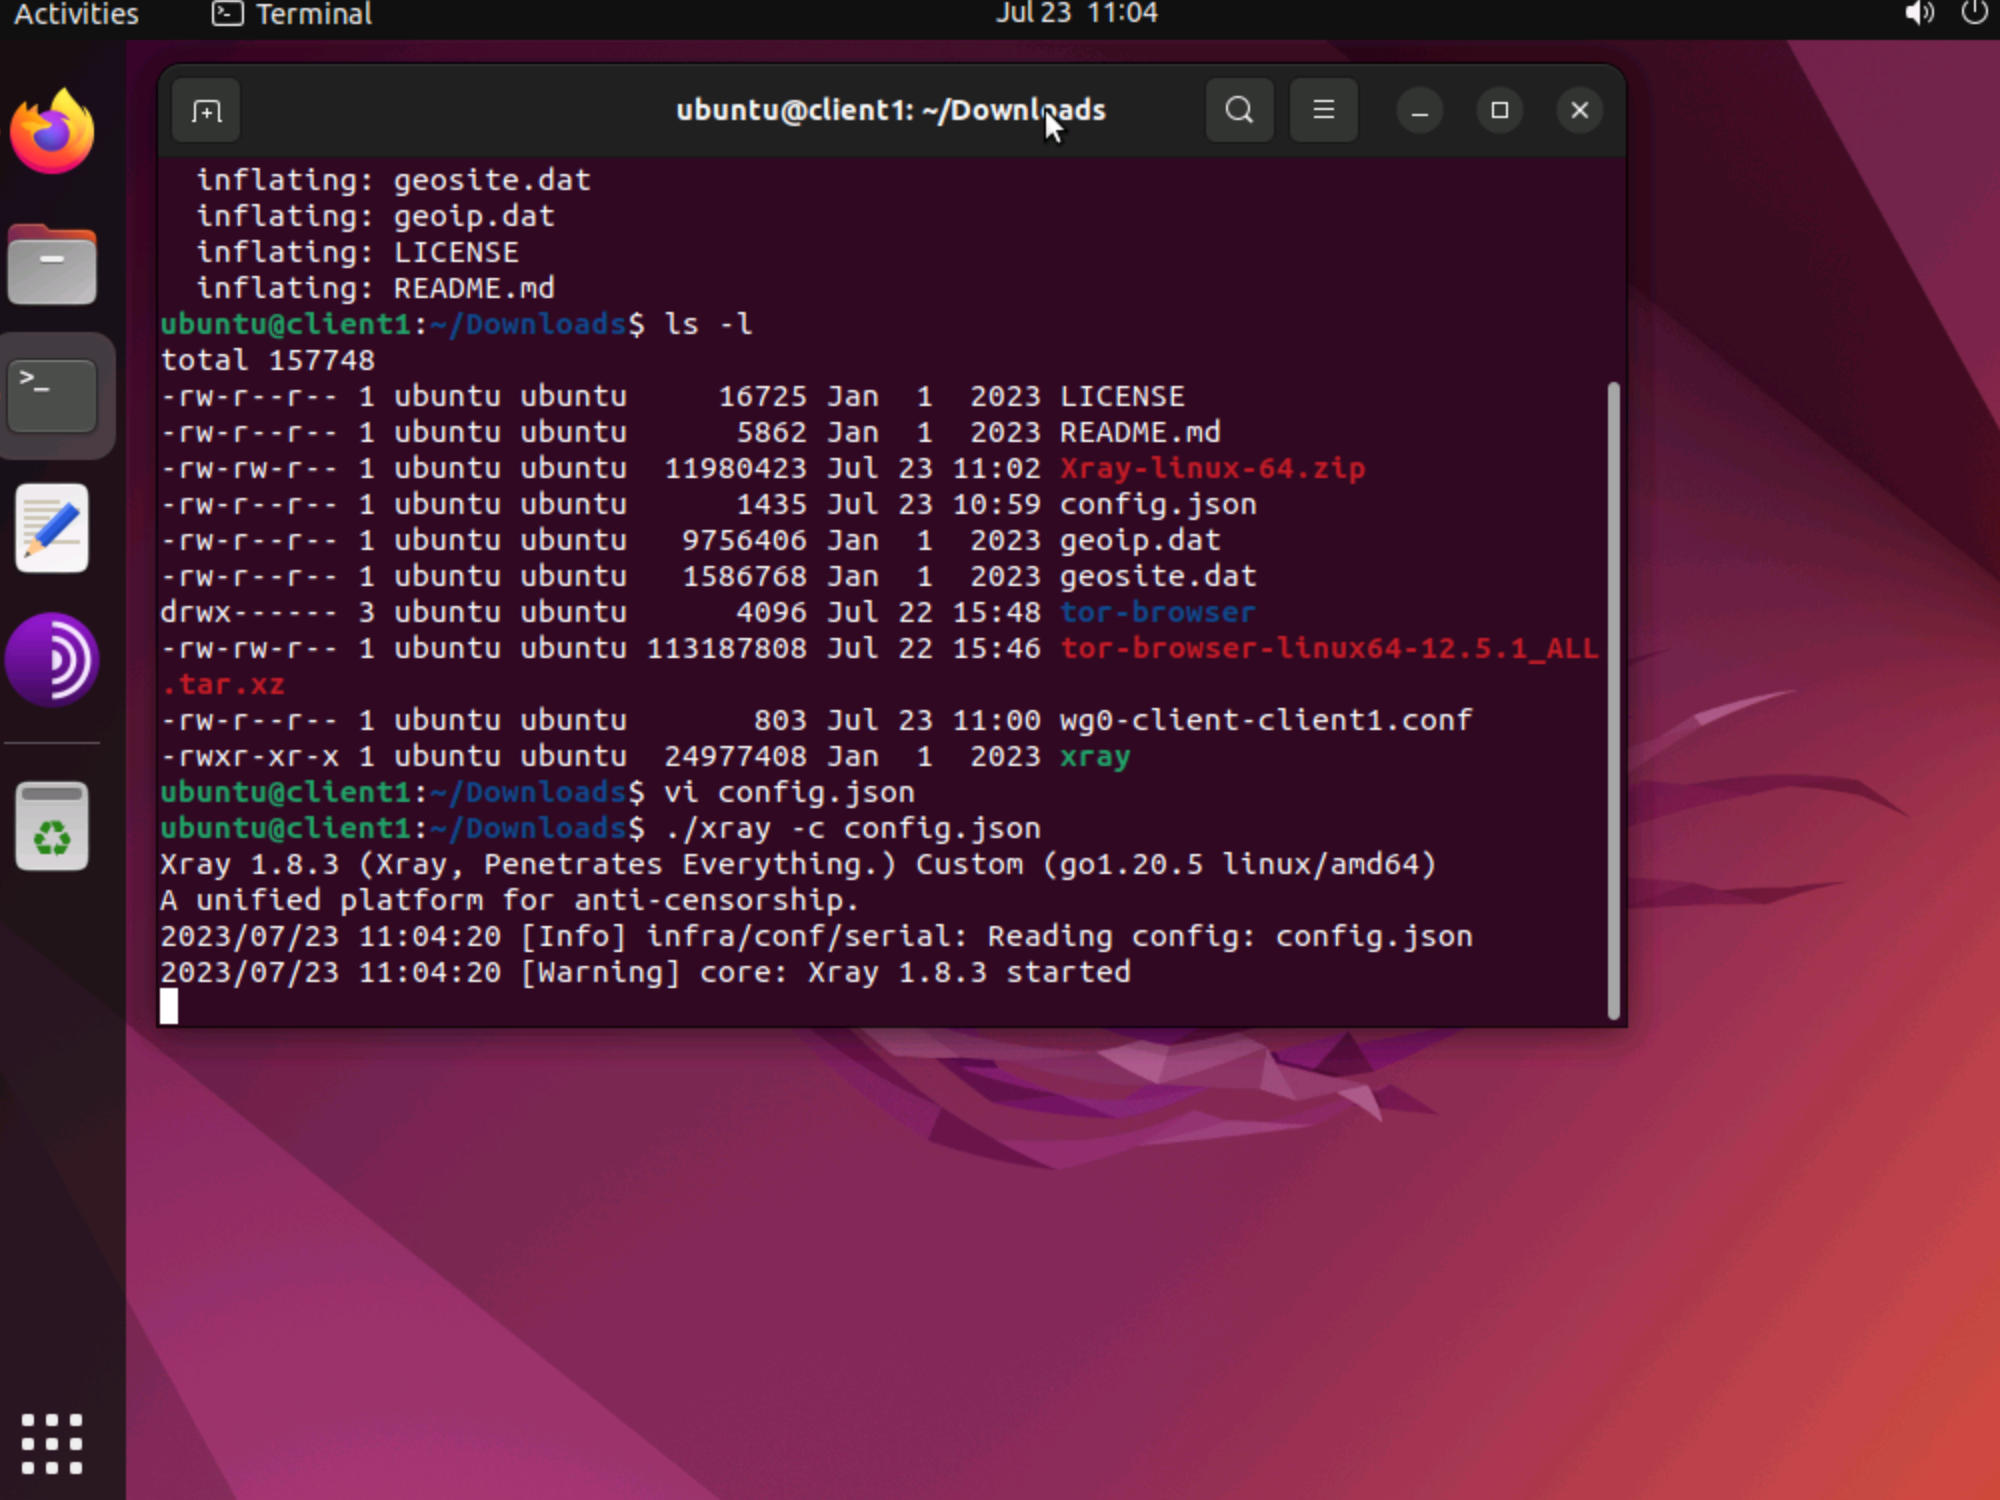
Download the Xray CLI client for your operating system and CPU from https://github.com/XTLS/Xray-core/releases. Unzip the zip file.
Create a file config.json in the same folder as the xray executable. Following is a template you can use for your client configuration config.json. Note that the Xray client will accept dokodemo-door input on port 51820. This part of the configuration is based on the Xray documentation.
{
    "log": {
        "loglevel": "warning"
    },
    "inbounds": [
        {
            "tag":"wireguard",
            "port": 51820,
            "protocol":"dokodemo-door",
            "settings":{
                "address":"127.0.0.1",
                "port":51820,
                "network":"udp"
            }
        }
    ],
    "outbounds": [
        {
            "protocol": "vless",
            "settings": {
                "vnext": [
                    {
                        "address": "YOUR.SERVER.IP.ADDRESS",
                        "port": 443,
                        "users": [
                            {
                                "id": "3b5390c5-52a2-472d-8dc2-103ef508be6c",
                                "encryption": "none",
                                "flow": ""
                            }
                        ]
                    }
                ]
            },
            "streamSettings": {
                "network": "h2",
                "security": "reality",
                "realitySettings": {
                    "show": false,
                    "fingerprint": "chrome",
                    "serverName": "www.lovelive-anime.jp",
                    "publicKey": "eZfl07Tg9UII29GaS23QXqB15aqrJ4Khm0vKJIcaMCo",
                    "shortId": "77c2358dc476ae9e",
                    "spiderX": ""
                }
            },
            "tag": "proxy"
        }
    ]
}
At a minimum, replace YOUR.SERVER.IP.ADDRESS with the actual Xray server IP address.
Save the file with your changes in it.
Set the CLI client running with the above config.json:
./xray -c config.jsonLeave the terminal window open with the xray program running in it.
Prevent routing loop
This is the critical step to get the whole thing to work. Normally WireGuard will route your entire Internet traffic through the WireGuard interface. You need to override that behavior for one specific address, namely the IP address of your server. Traffic for the server must not go back into WireGuard. That would create an infinite loop. Packets for the server must go out directly over the default gateway.
Open a browser. Visit https://www.procustodibus.com/blog/2021/03/wireguard-allowedips-calculator.
- Set Allowed IPs to
0.0.0.0/0,::/0. - Set Disallowed IPs to
YOUR.SERVER.IP.ADDRESS. - Press Calculate.
- Copy the resulting
AllowedIPs =line into your downloaded copy of the client configuration file, replacing the original line. - Save the amended client configuration file.
WireGuard client
WireGuard client -- Linux
For Linux you must install the WireGuard client from the command line:
sudo apt install -y resolvconf wireguardMake one last change to the generated client configuration. The WireGuard client must think it is talking to a server on localhost, which in fact is where the Xray dokodemo-door is listening.
Endpoint = 127.0.0.1:51820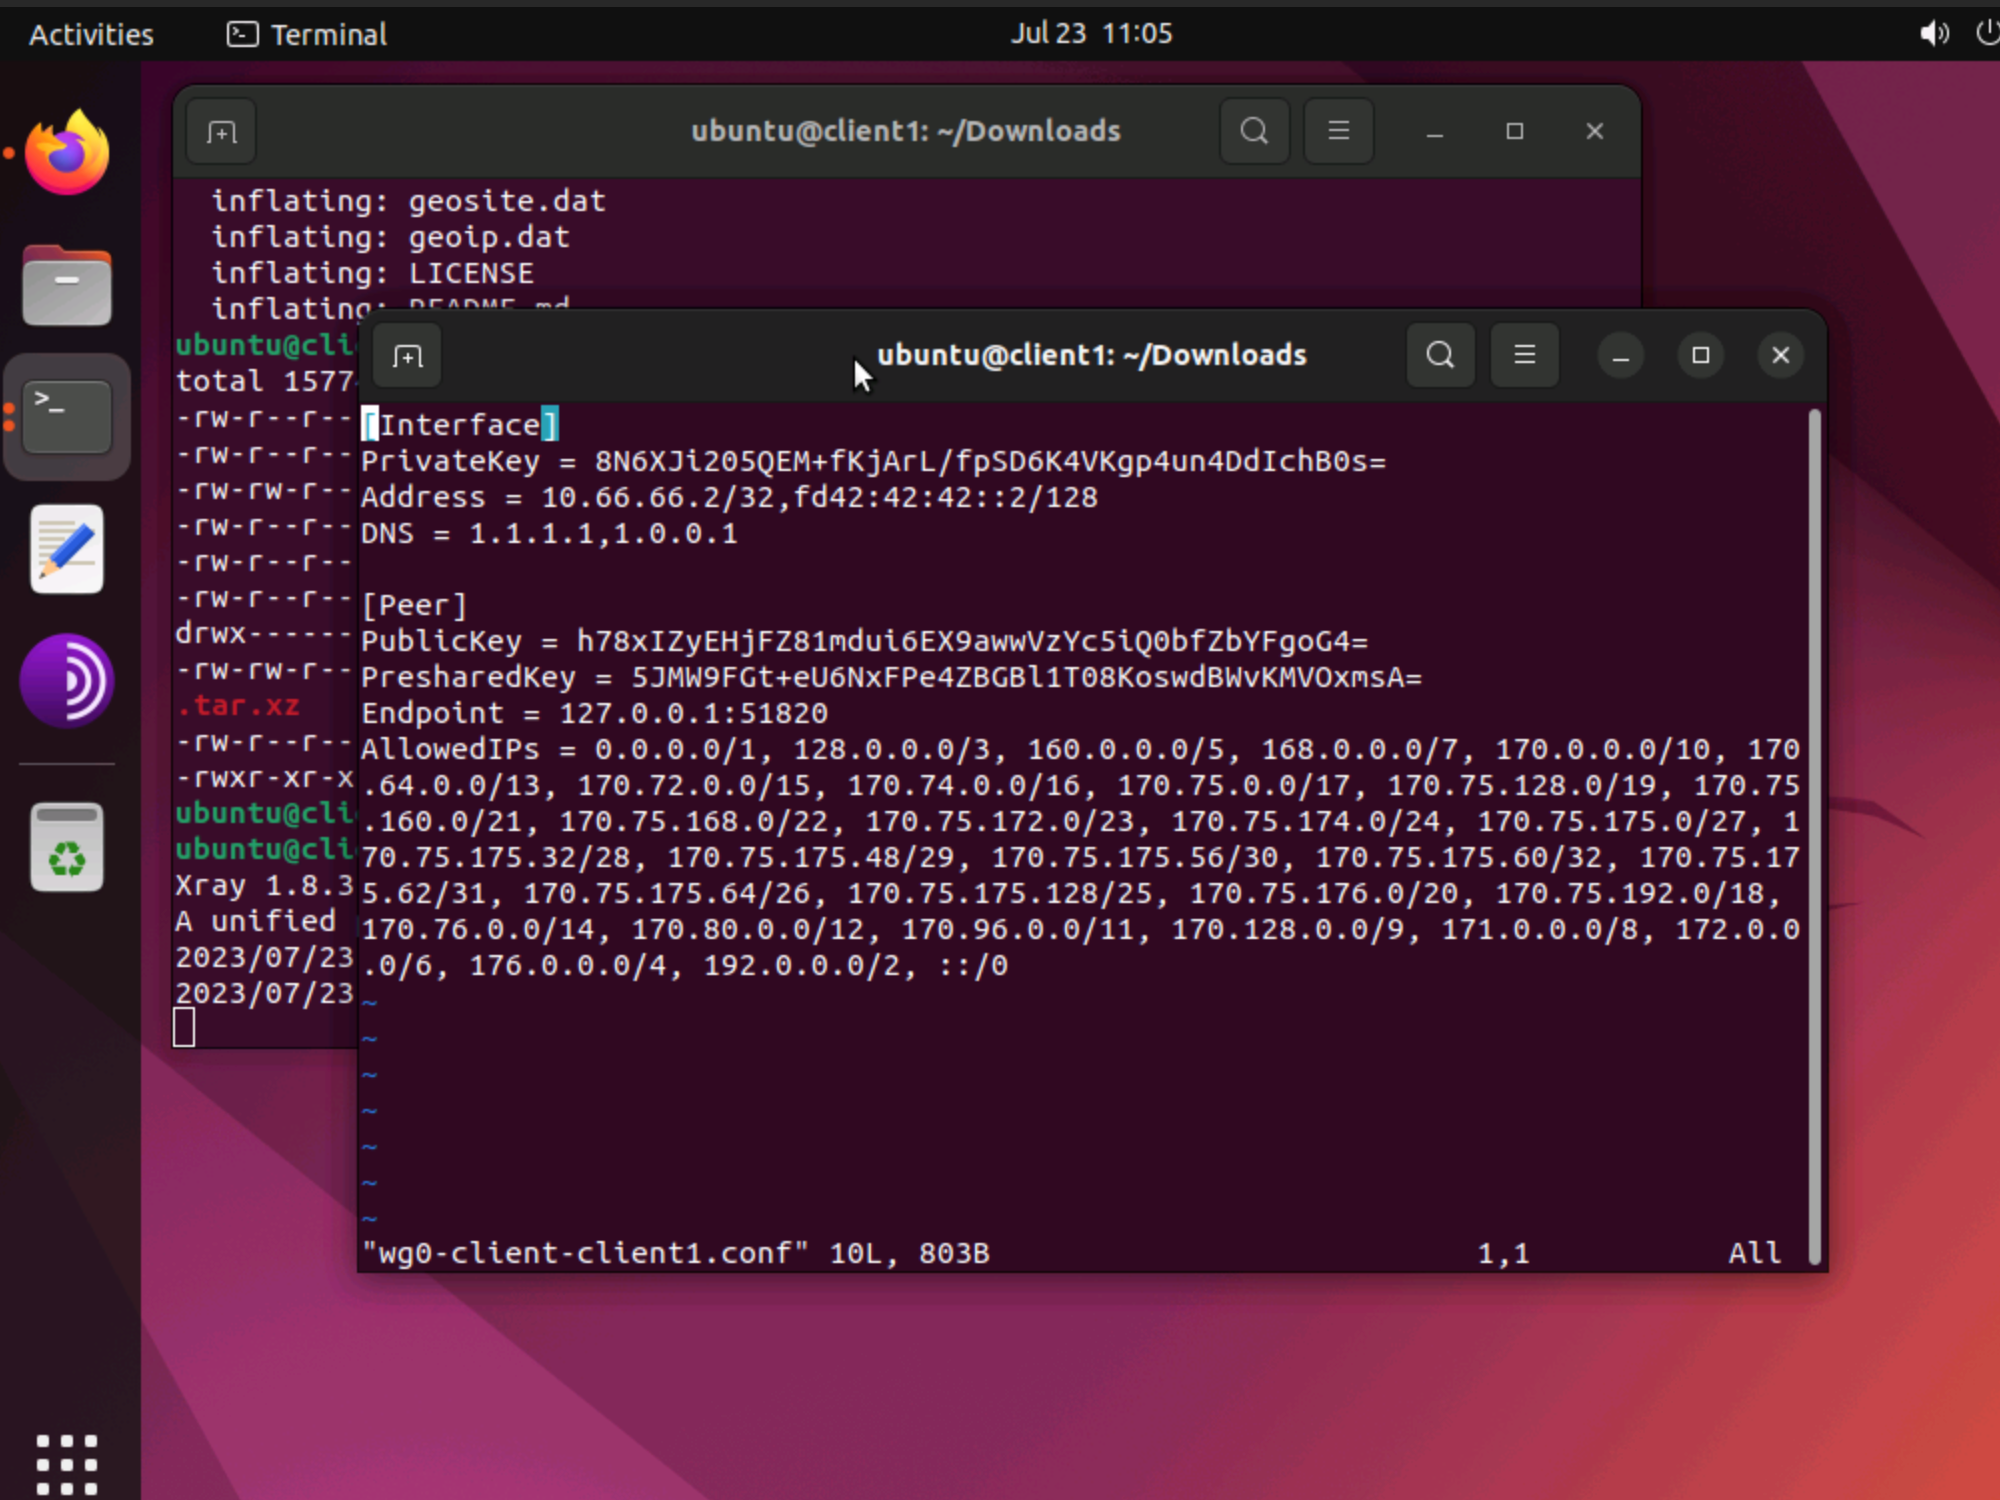
Now import the amended client configuration into your WireGuard client. Bring up the WireGuard tunnel. You can do this in the GUI client for Windows or macOS. For Linux you must bring up the interface from the command line:
sudo mv ~/Downloads/wg0-client-client1.conf /etc/wireguard/wg0.confsudo wg-quick up wg0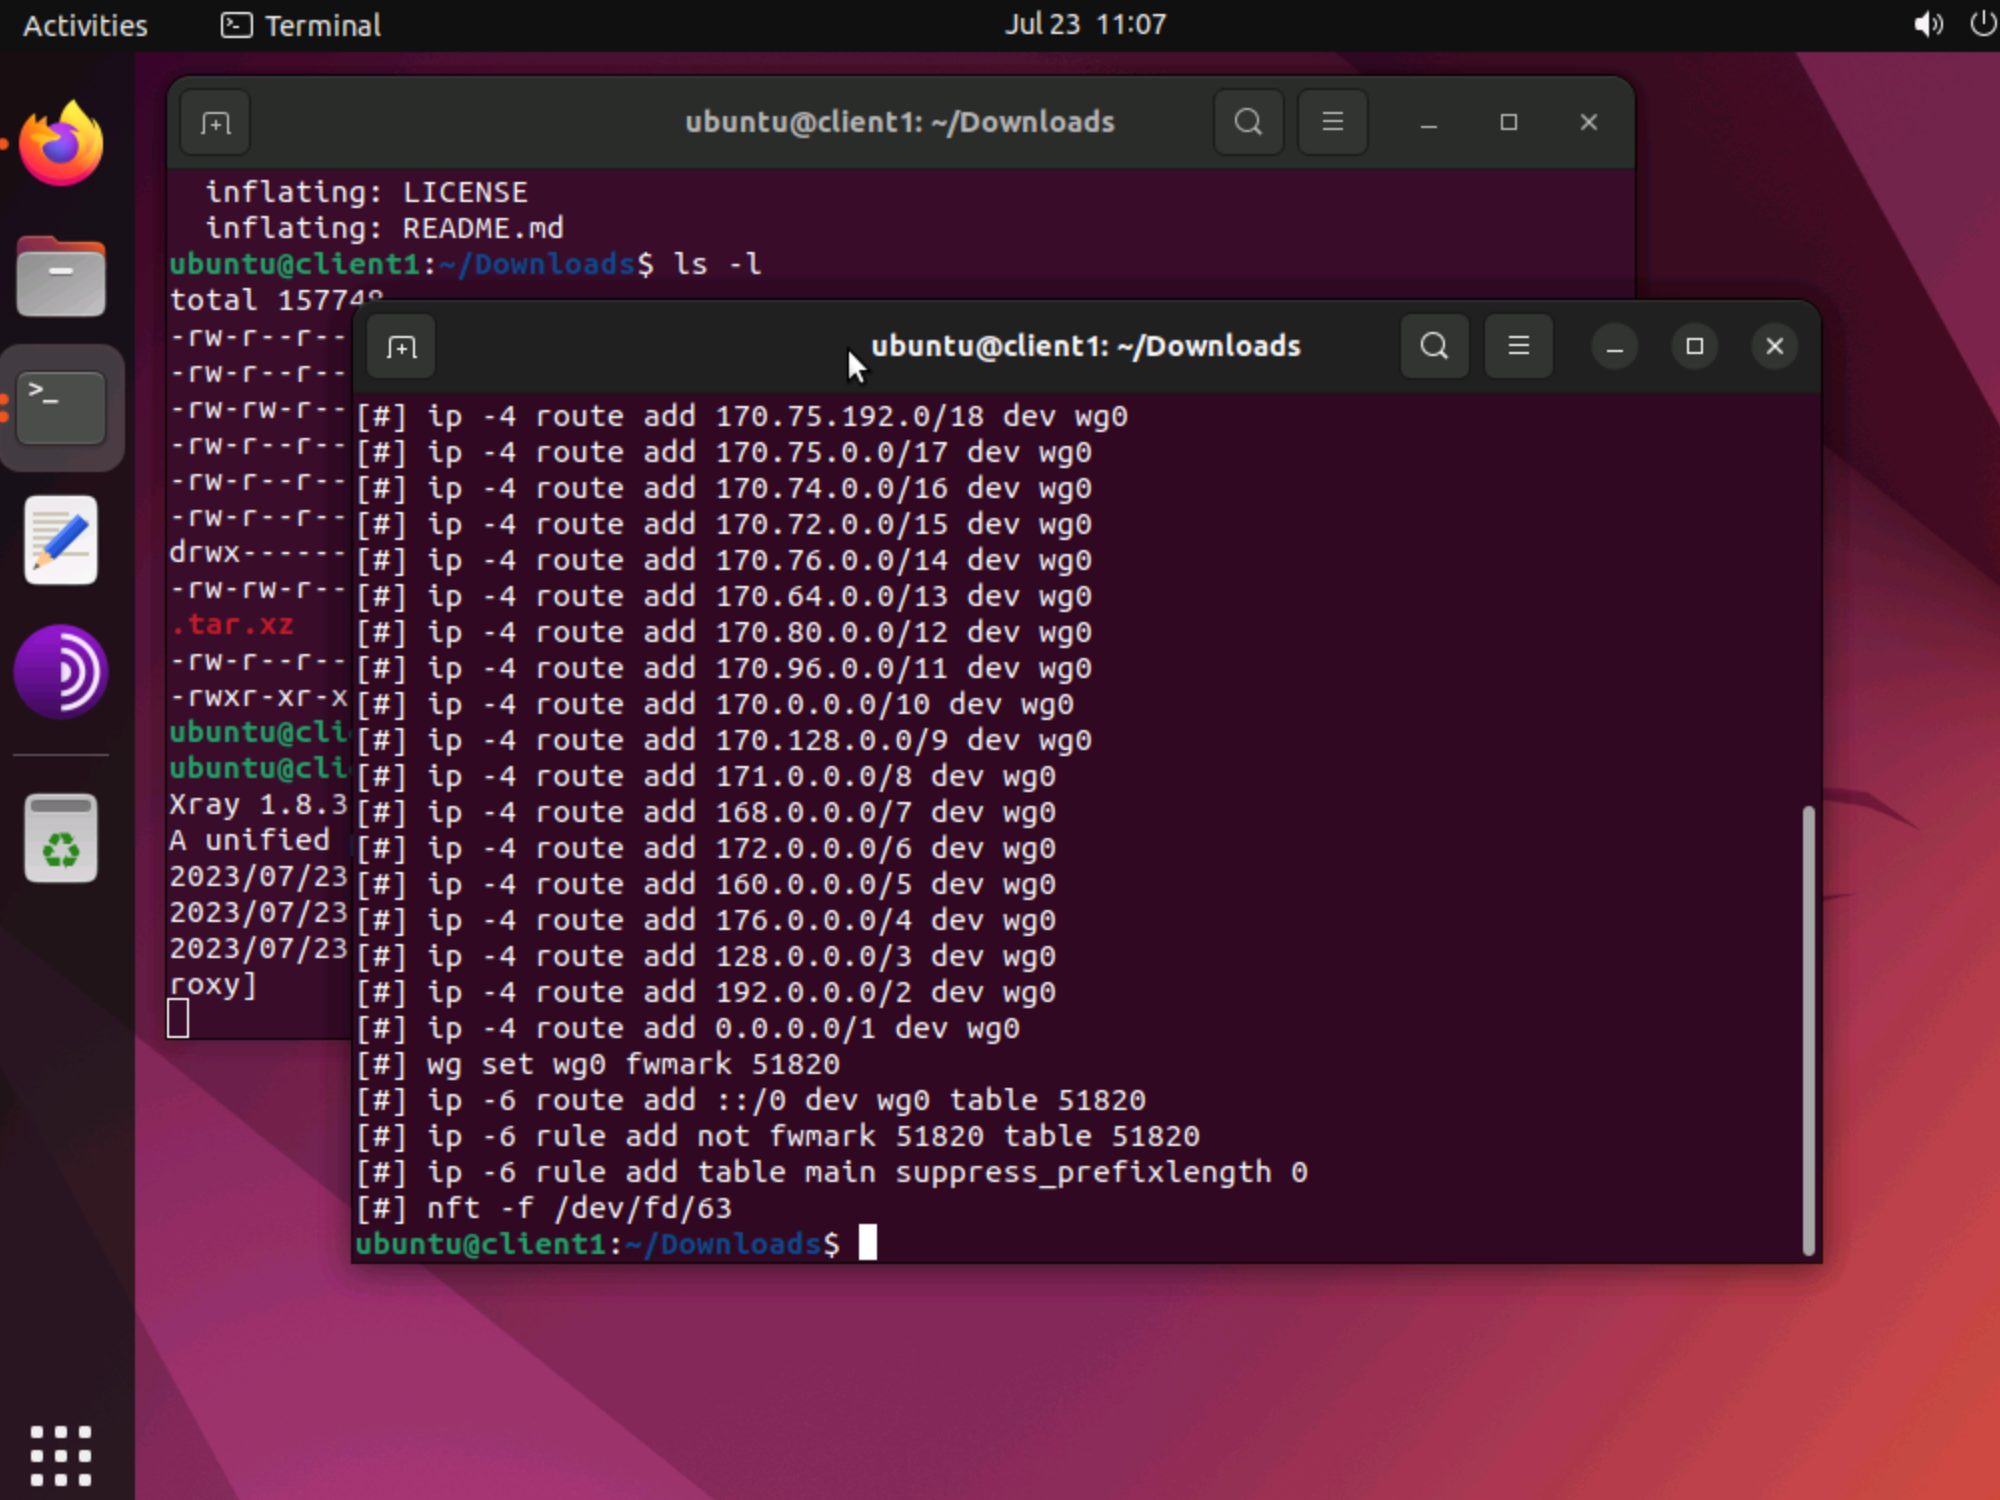
You should now have an end-to-end connection through the Xray tunnel.
WireGuard client -- Windows
The WireGuard for Windows GUI client is available from https://www.wireguard.com/install.
Edit the downloaded client configuration file. Change the [Peer] Endpoint from YOUR.SERVER.IP.ADDRESS:51820 to 127.0.0.1 port 51820:
Endpoint = 127.0.0.1:51820Reduce the [Interface] MTU from 1420 (the default) to 1300:
MTU = 1300Import into the WireGuard GUI the tunnel defined in your revised client configuration file.
Press Edit and uncheck the checkbox to block untunneled traffic (kill-switch).
Activate the tunnel.
WireGuard client -- macOS
A link to the App Store page for the macOS WireGuard client is given at https://www.wireguard.com/install.
Make corresponding changes on macOS to the ones you made for Windows.